What are Chemical or Chemset Anchors?
Chemical Anchoring
You’ve probably heard the term chemical anchors, chemset (brand name) or resin fixings before but maybe not sure what they are, well here’s a brief guide.
There is 3 main types of Chemical anchoring available on the market:
- Polyester Chemical Anchoring (cheapest, lowest load ratings, quickest cure times)
- Epoxy Vinylester Chemical Anchoring (middle tier pricing, high load ratings, slightly longer cure times)
- Pure Epoxy Chemical Anchoring (expensive, high load ratings, primarily for underwater use, very long cure times)
Chemical Anchors, Chemset Anchors - What are they?
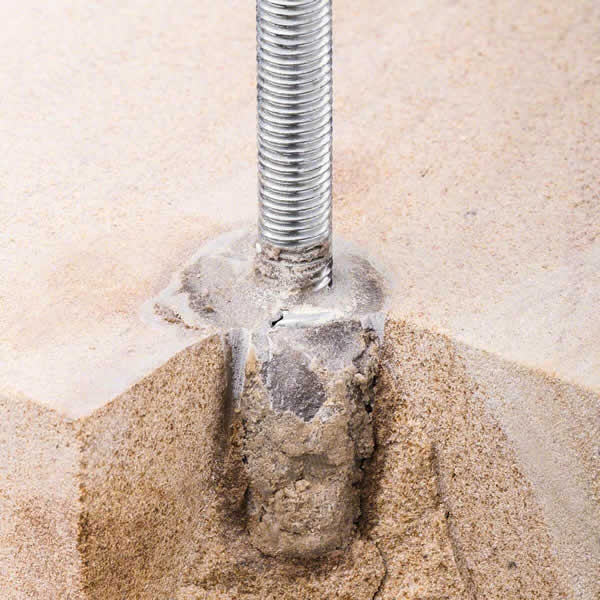
Chemical or resin anchors are steel studs or bolts which are bonded into a substrate, usually masonry and concrete, using a resin based adhesive system (chemical anchoring).
Think of chemical anchoring as a tube of concrete glue, or liquid concrete.
Its suited for high load applications as in virtually all cases the resulting bond is stronger than the base material itself. This makes chemical anchoring the go to in any high load fixing application.
The system is based on chemical adhesion or glueing of the bolts so no load stress is passed onto the base material which isn’t the case with expansion type anchors such as dynabolts, this bonding process makes them ideal for close to edge fixing, close spacings and group anchoring along with weak or unknown brisk and concrete materials.
Although there are many different brands, variations and delivery systems in the market, all systems operate using the same basic principle which is a 2 component base resin and activator which requires mixing, before the bolt is placed, to begin the chemical curing process, hence the term chemical anchor.
How do I use it?
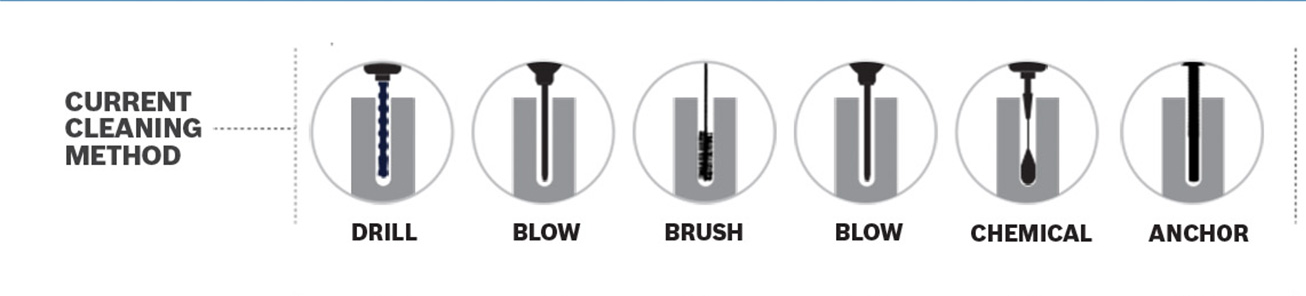
- Drill a hole ready for your chemical (usually 2mm wide than the bolt or stud you'd like to install, double check manufacters specific installation guide)
- Prep and clean the hole for the chemical anchoring (follow all dust extraction and prep instructions according the chemical manufacturer)
- Blow
- Wire brush
- Blow again
- Fill it 2/3rds (or however much your manufacturer specifies) full of chemical anchor
- Twist a stud or bolt into the hole to fully coat
- It's very important that you twist the stud into the chemical to fully coat
Then you wait for the chemical to set or 'cure' (cure times usually printed on the cartridge)
Heres an example of a cure time chart thats usually printed on the cartridges or comes as a leaflet with your chemical anchoring

Once cured you can start loading up your studs!
*disclaimer*
This guide is a super brief overview. Follow all manufacturers specific installation instructions when installing chemical anchoring.
Thanks for reading our latest blog entry
Best Regards,
The Scrooz Fasteners Team